Search This Blog

Showing posts with label Celestial Navigation 101. Show all posts

Friday, October 21, 2011

Celestial Navigation 101: Lesson 5, Objects in Motion (Introduction)

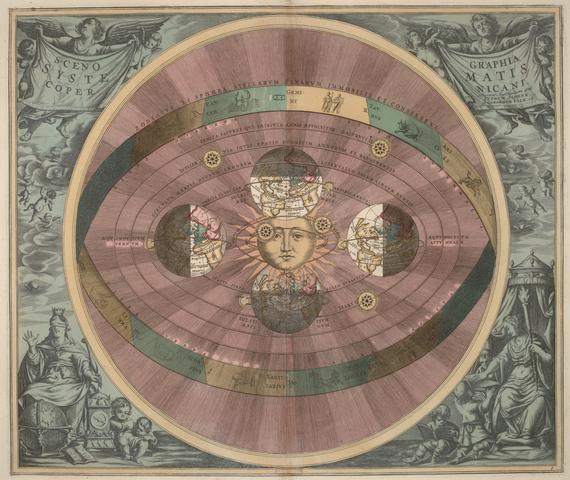
So far, we have looked at celestial objects as if they were more or less motionless in the sky. But with the exception of Polaris, nothing could be farther from the truth. The earth rotates on its own axis, causing the entire sky to appear to spin around it once every day. The earth revolves around the sun in an elliptical orbit once each year, and the other planets also revolve around the sun. The moon revolves around the earth, moving easterly relative to the stars. The stars themselves move relative to the earth and to one another. From our perspective this motion of the stars is minor, but not so minor that we can ignore it for our navigation.

I'll be on the water the next few days; when I'm back in front of a real computer we'll tackle the problem of how to determine the geographic position of a body in motion on a different body in motion.

Friday, October 14, 2011

Celestial Navigation 101: Lesson 4, Sextant Sights

Continuing with the basic introduction to celestial navigation, we now look at how we're going to actually use the sextant to determine the angle of the celestial object above the horizon. I've made a number of illustrations in MS Paint to illustrate what you will see through the sextant telescope. This was fairly simple. I have not, however, created corresponding illustrations of the sextant itself, either as a whole, or illustrating reading the limb or micrometer drum. I did attempt to render such illustrations in Paint, but doing so proved beyond my skill level. Hopefully their absence will not prove a stumbling block.

For this lesson I will assume that we are using a sextant with a traditional split-horizon mirror, but the principles are the same with a whole-horizon mirror also.

When you begin a round of sextant sights, you must first determine the amount of intrinsic error the alignment of the index mirror will instill into your sights. For a good metal sextant you might perform this step once every several days; for a plastic sextant you'll want to do this before and after every set of sights.

Set your sextant index arm to 0° 00.0'. Then look at the horizon. You will see something like this:


Now, adjust the index arm until the two images come together like this:


Now look at your index arm, and micrometer drum if your sextant has one. Unless your sextant is perfectly aligned, you will now read some number larger than 0° 00.0', either "on" the sextant arc between 0° and 90° or 120° or whatever number your sextant goes to, or else "off" the sextant arc beyond zero in the other direction. Which side this Instrument Error is on, you are going to correct your Height Shot (Hs) of the celestial object in the opposite direction. Think of it being like a jacket; if it's on, take it off, and if it's off, put it on. This opposite value of the Instrument Error is called the Instrument Correction, or IC. Write this number down, you'll be using it in all of your calculations later.

Now, move the index arm out toward the middle of the arc, somewhere around 40° is fine. Now looking at the horizon, on the index side of the mirror we see only sky:


Now, the sun has set and civil twilight has ended. We have precomputed that the star Capella bears about 043° True at an altitude of about 52° above the horizon. We dial 52° into the sextant index arm and aim the sextant toward the northeast horizon. And, by the miracles of astronomy and arithmetic, we find in our sextant telescope this:


Which is pretty darned impressive, considering.

You now, using the micrometer drum, bring Capella down until it just barely touches the horizon:


And to ensure that you are holding your sextant exactly vertical, you rock it back and forth so that the image of Capella also rocks back and forth. You want to measure the angle at the exact moment (very exact, remember four seconds of time is one nautical mile) that Capella barely kisses the horizon in lowest portion of the rockering.


That's all there is to taking a star sight with a sextant. Bring the star down to the horizon, mark the time, write the time down in your notebook, read the angle you shot off of the sextant limb and micrometer drum and then write those down next to the time. That's it.

The sun is mostly the same, with two exceptions. First, we have to use filters so that staring at the sun through a telescope doesn't burn out our retinas. In this case, the filter has made the sun appear purple.


Using the micrometer drum, bring the sun down so that the very bottom of the disk of the sun, called the Lower Limb, just touches the horizon. I haven't drawn it, but rock the sun just like you did with Capella. Because the sun is very bright, you will usually get a "ghost" image of the sun on the side of the horizon mirror that is not a mirror. It's perfectly fine to utilize this image.


If the sun is reflecting brightly on the water, you may need to use a filter on the horizon as well. In this example, the filter for the sun is dark purple and the filter for the horizon is light green. This incidentally is fairly common.


In almost every single case, you will use the Lower Limb of the sun whenever you shoot it. However, when you shoot the moon, depending on its phase and position in the sky you will sometimes need to shoot the Lower Limb and at other times you will need to shoot the Upper Limb, like this:


In most cases, the visible disk of planets are so small in a sextant telescope that you can simply treat them as points of light like a star. If the visible disk of a planet is large enough that you can easily discern an upper and lower limb, align the horizon with the center of the planet. Pictured here is Jupiter, with three of the Galilean moons visible:


That is really, really, all there is to it. Oh, except that I forgot to mention that the celestial body you're shooting happens to be moving.

More on that, soon.

Thursday, September 22, 2011

Celestial Navigation 101, Interlude: What sextant should I buy?

The question has come up as to which sextant I would recommend for people working through this course. This question happens to come up in any celnav course at some point, so it happens that I have a "stock" essay answer to the question which I usually give out on the first day of class. What follows is a slightly modified version of that, tailored to a wider audience than just students sitting in a Seattle classroom. If you are not interested in purchasing a sextant at this time but are following along with the Celestial Navigation 101 posts, do please read this, as it contains good general information about sextants which will be helpful later in the program. Because this is largely cut-and-pasted from a pdf, there may be some formatting issues. I'm endeavoring to correct the worst of these as I update the essay for this purpose, but please bear with.

First off, you do not need your own sextant for this course. You will eventually need one with which to practice sextant sights, and of course you'll need one on the water if you intend to incorporate celestial navigation into your ocean navigation routine.

Disclaimer: I do not sell sextants, nor do I have any vested interest in which sextant you purchase. For this reason, I will in some cases recommend one sextant or type of sextant over another without reservation. However, if you already own a sextant, and it does not happen to be one of the ones I recommend for purchase, don't worry; any marine sextant at all will do everything you need to safely navigate across an ocean. I will also discuss purchasing used sextants, which in some cases can be a very good option.

What does a sextant do?

A sextant measures angles. In celestial navigation, a sextant measures angles from the horizon up to an object in the sky, whether it is a star, planet, the sun or the moon. There are instruments which can measure angles more accurately than a sextant, but a sextant is the best tool for measuring angles from the deck of a small boat rocking in big seas.

Metal Sextants

Plastic, by its nature, allows more freedom of movement between the working parts of a sextant, and so creates more error in any given sight. However, with proper sight-averaging techniques (which we should be using with any sextant) a good plastic sextant will yield similar results to a metal sextant. The advantage of a metal sextant is that if we do not use proper sight averaging techniques we will still get a pretty acceptable fix. In other words, a metal sextant allows us to be a bit lazier and still navigate safely.

Metal sextants are made of either brass or aluminum. Aluminum sextants are lighter and less expensive than their brass counterparts. Lighter is generally better. The old argument that heavier sextants are somehow superior because they have “more inertia” is frankly absurd. If you are using proper sight averaging techniques you will be shooting a lot of sights for every fix, and if your arm is getting tired from lifting 10 lbs of brass up to your eye your sights are going to get sloppier.

The other common argument favoring brass over aluminum is that the worm-gears of a brass sextant are inherently more precise than those of an aluminum instrument. This is technically true. However, the difference in accuracy is somewhere in the neighborhood of .05' of arc. This is nominally a difference of about 100 meters, which seems like a lot to us in a post-GPS world. However, in order to make our math easier, celestial navigation is based entirely on the notion that the earth is a perfect sphere, which it is not. So the inherent errors in this assumption alone will generate errors of a quarter mile or more for a dockside fix, and from the deck of a small boat in large seas it is unrealistic to imagine that we will get a fix much more accurate than one nautical mile from our actual position. Which sounds like a fairly large error, but is actually far more accurate than we can possibly steer a boat to compensate for on a voyage from, say, Seattle to Honolulu. So the advantage of a brass sextant in accuracy is as negligible as that of, for example, using a scale calibrated to micrograms to sell apples by the pound.

A better argument in favor of brass sextants is that they are more durable than their aluminum counterparts. This is demonstrably true. A well maintained brass sextant under rigorous daily use will last generations, whereas an aluminum sextant under the same conditions might last only a few decades, due to friction slowly degrading the worm-gear. Realistically, in this day and age when celestial navigation is mostly a redundant back-up for GPS and we are typically only shooting one celestial fix each day, a good aluminum sextant will last your entire seafaring career, but it will not also last through your grandchildren's seafaring careers. An aluminum sextant is a working tool, a brass sextant is an heirloom.

The last (and best) argument in favor of brass sextants is that they simply look better than aluminum sextants. They do. Personally, I love the way a really well-made brass sextant looks and feels. The mechanisms move more smoothly, and they just look and feel “nicer” than an aluminum sextant. Standing on the dock, or in the classroom, there's nothing better to do celestial navigation with than a brass sextant. But I probably wouldn't actually take one to sea with me on a small boat, because if I were to lose a $2000 sextant over the side I would be very, very sad.

Brass Sextants


The best and most easily available new brass sextants are from Cassen and Plath in Germany, and Tamaya in Japan. Typically you must purchase the sextant and the telescope (a 3.5x40 scope is standard, and probably the best all-around scope for most applications) for the sextant separately, and the combined cost will be around $2000. This is actually about half the price the same sextants were being sold for 10 years ago, due largely to the impact aluminum sextants have had on the market.
Tamaya sextants are sold by Captain's Nautical Supply, www.captainsnautical.com, Cassen and Plath sextants are available online from Celestaire, www.celestaire.com
Old US Navy surplus Mark 5s are excellent (if somewhat utilitarian) sextants if you can find them.

Aluminum Sextants


The best aluminum sextant available new is the Astra IIIb, from China. This is the instrument used by the Chinese Navy and Merchant Marine, as well as most of the navies and merchant marines around the world. It is by far the best selling sextant in the world, with good reason. My own preferred sextant is an Astra IIIb. They retail for about $600. Astra sextants are available locally from Starpath School of Navigation, www.starpath.com.

Another good aluminum sextant is the CHO-T sextant (the more correct transliteration from Cyrillic is SNO-T, but nobody seems to want to buy one of these) from Russia, which is a knock-off of the Freiberger sextant from Germany. These instruments can usually be found in good condition used for somewhat less than the price of a new Astra IIIb. Be careful to buy a marine sextant if you get a CHO-T, because they also make astronomical sextants which are otherwise identical but leave the telescope image inverted.

Plastic Sextants

Plastic sextants have a bad rep. This is not entirely undeserved, but some of the bad reputation which plastic sextants have is plainly spurious. One of the most frequent complaints I've heard about plastic sextants is that if you leave them out in the sun, the plastic expands and thus degrades your sight. Yes, plastic left in the sun will expand. However, it will tend to expand evenly, so this should not actually affect your sight. Also, no navigator worthy of the name is going to leave any sextant out in the hot sun, so the point is moot. What is not moot is the fact that plastic worm-gears (or even plastic-on-metal worm-gears) are too malleable for the precision desired of a sextant. Even so, a sextant with a plastic worm-gear is still significantly more accurate than any other means of deriving an angle from a moving boat at sea, such as an astrolabe or kamal, so it is still a worthwhile tool to have on board.


Plastic sextants are available from Davis Instrument Corporation, which is the only company in the United States which manufactures sextants. Davis sells three basic models of plastic sextant. Unlike metal sextants, and utterly counter-intuitively, with Davis sextants what you pay for is inverse to what you get. The “standard” Davis sextant is the Mark 15, which runs about $170 new. It has all of the problems previously noted with plastic worm-gears, but is otherwise a functional sextant. The “deluxe” Davis sextant is the Mark 25, which retails for about $220 new. It has all of the problems associated with the Mark 15, and additionally has a “whole horizon” beam-splitting mirror, which is generally inferior to the traditional split mirror of the Mark 15 (more on mirror differences later). The main selling point of these two sextants is that they look and operate more or less like most metal sextants. Frankly, for the same price you will probably be much better off getting a used metal sextant on eBay, which I would not otherwise ever recommend.


Davis, however, makes one more sextant, which more or less redeems them from the sins of manufacturing the other two. It is called the Mark 3, and it retails for about $50. The Mark 3 is about the very least thing that could ever consider itself to be a functioning marine sextant. It is made out of stamped plastic and held together with model airplane glue, and has only one significant moving part, which is its saving virtue. There is no worm-gear, just a simple pivot point, and instead of a traditional micrometer drum to read minutes of arc it has a very simple vernier scale. The Mark 3 isn't pretty. It doesn't seem to work in the same way as a more traditional sextant (although the basic principles are the same), has no telescope, and instead of a beam-splitter or a traditional split horizon mirror has a simple glass mirror and thin air. In spite of this extreme simplicity (or rather, because of it), if proper sight-averaging techniques are used, the Mark 3 will yield results very comparable to those of an aluminum or brass sextant of $2000 or more. Neither of Davis' more expensive sextants can make this claim. So, for $50 for the sextant, $30 for a Nautical Almanac and $20 for a decent quartz watch, you can be adequately equipped to navigate across an ocean for about $100, roughly the same price as a bottom-shelf handheld GPS or a good hand-bearing compass.

Used Sextants

Given normal maintenance and usage, there really isn't a great deal that will go wrong with a good sextant. A mirror might need to be replaced or resilvered, and also realigned, but that's usually about it. Unless you are very knowledgeable about sextants, do not buy a used one on eBay. The vast majority of sextants sold on eBay or similar venues are ornaments not intended for navigation, even if the ad says otherwise. This is not because the sellers are dishonest, it is because they are not navigators and do not know the difference between a sextant and a wall-hanger.

As far as buying a sextant from a second-hand boating supply place, chances are good that if you stay with a known brand that you will get a decent instrument. My best recommendation, however, is to wait to buy a used sextant until after you have completed this course, and are more knowledgeable about sextants generally.

What type of horizon mirror is best?

There are generally two types of horizon mirrors for sextants. The traditional or “split image” type is a piece of glass which is only silvered on one half of its surface. This allows you to see the reflected image (from the index mirror) of the star in the silvered side, while viewing the horizon through the unsilvered (clear) side.

“Whole horizon” or beam-splitter mirrors are partially silvered across their entirety, and so partially reflect the star and partially display the horizon in the same field of view. In doing so, 50% of the light of the object is lost, and 50% of the light of the horizon is also lost. This is not a problem when both the object and the horizon are very visible, such as shooting the sun on a clear day. However, it makes shooting a dim star with a faint horizon nearly impossible, and shooting a daytime moon or Venus amid any amount of cloud cover utterly impossible. The only virtue of the “whole horizon” mirror is that it makes sun-sights a little bit easier for a rank beginner. After a few minutes of sextant practice, you will have no difficulty using the traditional mirror to obtain a sunline, and so will have no further use for a whole-horizon mirror.

What about bubble-sextants and artificial horizons?

Some military sextants are equipped with a “bubble” attachment for use by submarines on dark nights. An actual, functional bubble attachment is very, very expensive, and of very little utility for any vessel which is always on the surface. The “practice bubble attachment” sold by some companies is basically a carpenter's level, and for actual navigation (or even sextant practice) is essentially worse than useless.

Some companies also sell an “artificial horizon”, which is little more than using a tray of water to reflect the image of an object back onto itself. You can achieve the same thing with a pie-plate or a rain puddle and save yourself the $30 or so that most companies charge. But this isn't the way we shoot sights, so it really isn't even useful for training. You are much better off using even a small body of water and computing for the difference between the near shore and the horizon. However, if you have even three miles of water between you and the opposite shore (such as is true for most of Puget Sound, for example), you have a real horizon, even though you can see land beyond the curvature of the earth.

Okay, so what is my best bet?

Based on all of this, my recommendation is that an Astra IIIb aluminum sextant, with a traditional split mirror, is your best bet for the money.
If that's out of your price range, a Davis Mark 3 is a great value at a very small cost.
Celestial Navigation 101: Lesson 3, the Navigational Triangle

Here's another topic where you don't have to take notes. You will not actually ever do any of what I'm about to demonstrate. You will have logarithmic tables or calculators to do all of this for you. But, pay attention anyway. This is the cornerstone of all traditional celestial navigation; everything else we do is based on this.

We begin with three known pieces of information.

From the Nautical Almanac or other similar source, we know the latitude and longitude of the geographical position of the celestial body at the moment we observed it. We call the latitude of an object in the sky Declination, or Dec. We call the longitude of an object in the sky Greenwich Hour Angle, or GHA.

We know our own Assumed Position (AP). This may be our dead reckoning position, it might be our GPS position, or, depending on the method we intend to use to reduce the observation to a line of position, it may be something rather more arcane than this. It really doesn't matter, we just need something to use as a baseline to compute and compare the actual observation to.

Our Assumed Position can be broken down into two parts, Assumed Latitude (aLat) and Assumed Longitude (aLon).

So, in essence, we know both the latitude and longitude of both our own assumed position, and the geographic position of the celestial body.


The latitude (declination, really) of the Geographic Position of the body is a distance from the equator. We know that the total distance from the equator to the pole is 90°. So the latitude of the GP of the body, subtracted from 90°, is the distance in degrees from the pole to the GP of the body. This number is called CoDeclination. The same is also true for the latitude of our Assumed Position. This number is called CoLatitude. You don't need to worry about CoDeclination or CoLatitude, the logarithmic tables will take care of them for us. But it's good to understand the principle.


The difference between the longitude (really GHA) of the celestial body and our own Assumed Longitude is an angle centered on the pole. This angle is called the Local Hour Angle (LHA) of the celestial body.


Once we know the length of our CoLatitude, the length of the CoDeclination of the body, and the angle (LHA) between them, we have only to calculate a side-angle-side triangle using the principles of spherical trigonometry to determine the length of the remaining side of the triangle, and the angle between our own longitude and this leg.

Going back to Lesson 1 on Circles of Equal Altitude, we know that 90° minus the height of the celestial object (in degrees above the horizon) equals the distance from ourselves to the Geographic Position of the object. So, conversely, 90° minus the computed distance to the GP equals the height of the celestial object above the horizon.

And going back to Lesson 2 on the Azimuth Intercept Method, the difference between our Computed Height (Hc) and our actual Observed Height (Ho) of the object is the difference in nautical miles between our assumed position and our actual position.

That's it. Everything else we do in this course will be anchored on this principle.
Understand this lesson, and everything else which follows will fall magically into place.

If you don't understand this lesson, don't sweat it. Lots of people don't, and still manage to navigate across oceans safely with just a sextant and a chronometer. The whole purpose of the various tables we're going to use is to eliminate the need to understand this lesson.

What you do need to understand is this. Whatever method you choose to use to reduce your observations to a line of position, you will first need to determine three things:

1) Your own Assumed Latitude

2) The Declination of the celestial body

3) The Local Hour Angle (LHA) between the body and your own assumed Longitude.

Latitude, Declination, Local Hour Angle.

"Lat, Dec, LHA."

Say it over and over again until it becomes a mantra. Really.

That's one of them Very Important Concepts.

Sunday, September 18, 2011

Celestial Navigation 101, Interlude: Euclid Wept

Sit back for a minute and relax. You don't have to take notes for this part, there won't be a test, and it won't directly affect your navigation. What it will do, hopefully, is illustrate the necessity of the steps which will follow in the next and subsequent lessons.

Follow along with this illustration of the globe. It will help.


We have not yet discussed longitude lines, but they are imaginary lines which run north and south around the circumference of the globe, intersecting both poles. Don't worry yet about how they're measured, or from where; that will come later. For now, just understand that they are lines which run along the circumference of the globe, from one pole to the other.

In our illustration there are two lines of longitude shown, at an angle of about 70° apart from each other.

It is clear (I hope) from the illustration that each of the longitude lines intersects the equator at a 90° angle. This happens to be true for all longitude lines.

Also shown is another latitude line north of the equator, which is also intersected by each of the longitude lines at a 90° angle.

All latitude lines are parallel to the equator. Since the equator and the other latitude line are parallel to each other, and the two longitude lines are intersecting both the equator and the other latitude line at the same angle, the two longitude lines are by definition also parallel to each other.

If we draw a triangle with two of the legs extending down our two longitude lines from the north pole down to the equator, and then for our third leg connect these two legs along the equator, we see two interesting things.


The first is that the three angles of the triangle are 90°, 90° and 70°, which, if added together, equal 250°.

The second is that our two longitude lines, which have been demonstrated to be parallel to each other, must necessarily converge and intersect at the north pole.

Very Important Concept: Two parallel lines often intersect, and the sum of the three angles of a triangle must always be greater than 180°.


It is possible that at some point in your education you were told something which was somewhat contrary to this. If you are somewhat surprised to learn that parallel lines intersect, and that the sum of the three angles of a triangle may never equal 180°, you are to be forgiven. Your high school geometry teacher, however, is not. A geometry teacher should know better. It happens that many of them don't.

If you happen to be of an age where you have not yet been exposed to the wonders of Euclidean geometry, never fear; at some point in your schooling, you will be. And on that golden, sunny day, listen politely while your teacher explains that two parallel lines can never intersect, and that the sum of the three angles of a triangle must always equal 180°. Once they are finished, please raise your hand. When you are called upon, please politely explain to your teacher that while their lecture was positively delightful, it turns out that the world is round, like an orange, or a bowling ball.

They love that.

The point of this exercise is to illustrate that solving a triangle on a spherical surface is, frankly, not making mud-pies. In some twenty-plus years of teaching celestial navigation I've had maybe two or three students who were comfortable solving spherical trigonometry with a scientific calculator, and not a single one who could solve it long-hand without a scientific calculator. Don't worry, nobody will expect you to; we have logarithmic tables or programmable calculators to solve the triangles for us. But this is why we need the logarithmic tables in the first place.

We'll see some of these soon. But our next topic will be looking at how we use this triangle to derive our celestial line of position.

Friday, September 16, 2011

Celestial Navigation 101: Lesson 2, Azimuth Intercept Method

In our last lesson we demonstrated how to derive one's position on a globe, using the distances from the points on the earth directly below three celestial bodies.

However, we do not navigate on globes. We navigate on flat pieces of paper (or computer screens) which represent only the tiniest fraction of the surface of the globe. In all but the rarest of cases, the Geographic Position of the celestial body isn't even on the chart we're navigating on. So how does one go about plotting a circle of equal altitude on a chart, when the point the circle is centered on isn't on the chart, or even on the boat?

The bad news is, you can't. The good news is, you don't have to.

This particular problem, by the way, troubled navigators for decades. Marcq St Hilaire discovered one solution to this problem which we still use today.

St Hilaire's solution was actually a fairly simple one. Previous navigators had sought to be able to determine their location "cold", without any idea of where they were before they derived the location. St Hilaire realized that while this was an interesting thought-problem, it wasn't relevant to the way vessels at sea are actually navigated. In actual navigation, you always have some idea of where the vessel is, by dead reckoning (which will be covered in detail in a later lesson) if by no other means.

If you have an assumed location, even if that assumption is wildly erroneous, then instead of measuring the distance from the Geographical Position of the celestial body, you simply calculate the altitude of the body as it would be from that Assumed Position (AP), and then compare that calculated altitude with the actual altitude which was observed and measured with your sextant.


If your computed altitude of the body is a greater number than the observed altitude, you must be further away from the body by whatever amount the difference is. Remember that 1' of arc is one nautical mile. So, for example, if I compute the altitude of a body to be 46° 22', and then I observe the altitude to be 46° 08', then I have to be 14 nautical miles further away from the body than I thought I was. A mnemonic for this CGA (Coast Guard Academy), which stands for Computed Greater Away. If the Height Computed (Hc) is greater than the Height Observed (Ho) then your Line of Position (LOP) is moved away from the direction of the body, from your Assumed Position. This difference is called the Intercept, and it is from this that we get the name Azimuth Intercept Method. It is our primary method of celestial navigation. Note that the circles of equal altitude are so large that we can simply plot the segment of it which is closest to us as a straight line. Plotted on a chart or plotting sheet, our observation looks like this:


The red dot inside the red square is your Assumed Position on the chart.

The blue arrow is in the direction of the Azimuth (Zn) of the celestial body from your Assumed Position. Azimuth is just an astronomical word meaning "bearing" or "direction". In this case the azimuth is about 045° True, or roughly north-east. This is the direction you were facing when you observed the celestial body with your sextant.

The green line, which is perpendicular to the azimuth line, is however many minutes (nautical miles) distant from your Assumed Position as was the difference between your Height Computed and your Height Observed. In this case, because the computed height was greater than the observed height, it is further away from your assumed position than the celestial body. This green line is your Line of Position. You are actually somewhere along this line, as opposed your assumed position.

If your observed height had been greater than your computed height, it would have looked more like this:


If your Height Observed (Ho) is more than your Height Computed (Hc), your Line of Position must be closer toward the celestial body than your assumed position. Ho More Toward; HoMoTo. I've heard a number of different mnemonics for this, none of which are particularly politically correct.

Plotted on a chart or plotting sheet, this line of position looks something like this:


And you are somewhere on that line of position, rather than at your assumed position.

Now, do this with two more celestial objects, for a total of three lines of position:


Where the three green lines of position cross, labeled in this case with a black dot inside a small black circle, is your fix. This is the position of your vessel at the time you observed the three celestial bodies. If you were actually navigating, you would now update your dead reckoning track to this fix.

This plotted fix frankly looks like a mess. That's just what it is, and that's just what your fixes will look like.

In the next lesson, we will begin to see how the height and azimuth of the celestial body are computed.

Thursday, September 15, 2011

Celestial Navigation 101: Lesson 1, Circles of Equal Altitude

We're going to start with the easiest and most fundamental concepts first, and then build upon these. Throughout these lessons I will occasionally flag something in bold as a Very Important Concept. In some cases these may at first seem trivial, but they represent conceptual pitfalls I have encountered often in the 20+ years I've taught celestial navigation. Bear with; if I'm flagging a concept, however seemingly obvious or mundane, there's probably a point to it.

Okay, let's begin.

Very Important Concept: The stars are very far away.


Imagine that there is a bright object in space which is pretty close by. Perhaps at the distance of the orbits of the GPS satellites. Let's imagine that there is a giant desk lamp floating at the distance of the orbits of the GPS satellites. Seen from space, it looks something like this:


The light from the desk lamp arrives at the earth from different directions in space, depending on where on the earth you are observing the desk lamp from. This difference is called parallax.

However, the stars, and incidentally the sun and most of the planets, are so far away from the earth that the light rays coming from them are parallel to each other, so that wherever you are on earth they are seen to be coming from the same direction in space. Like this:


Note that because the earth is roughly spherical, the angle which the light from the star is seen from earth changes, depending where the observer is on the sphere.
We'll come back to this point in a moment.

Not only is the earth roughly spherical, it is spinning. Because it is spinning, we can define directions and locations on the sphere relative to that spin. Without that spin, we would have no reference for direction. We call the two places where the hub of the spin intersects the surface of the earth the poles, which we then arbitrarily name "north" and "south". The part of the sphere which is farthest away from both the north pole and the south pole, the part which is spinning the fastest, we call the equator.

We call the direction the sphere is spinning toward "east" and the direction the sphere is spinning away from "west". We won't be addressing east and west for a while yet, that's pretty advanced stuff for a later date. But I wanted to get those terms out there.

Because the earth is kind of like a sphere, and because a sphere is basically a three-dimensional circle, we divide the perimeter of the earth into 360 equal units. This is also arbitrary; it could just as easily be a hundred units, or a thousand, or seventy-three. But 360 degrees is the convention we have used since Euclid, so we'll roll with it. So to speak.

The convention we use is to call the equator 0° and the two poles 90°, north and south, respectively. Between these in each direction are 90° of latitude. Each degree of latitude is divided into 60 equal minutes.

Very Important Concept: A minute of latitude, and any other minute of arc on the earth, is equal to one nautical mile.

This, in fact, is what a "nautical mile" is, and why we have such a thing. Just remember "a mile a minute" as a mnemonic. Incidentally, from this point forward in this series, at any point you see the word "mile" by itself, assume that it means a nautical mile. We will have no reason to ever use the other kind in this series.

Okay, so. The earth is spinning, we're on it. Imagine now that you are standing at the north pole, exactly, 90° north, the very hub of the spinning planet. Now, let's further imagine that there is a star EXACTLY over the north pole. We'll call it Polaris. Now, in reality, the real Polaris is NOT exactly over the north pole. It happens to be pretty close, but "pretty close" isn't good enough for this demonstration. That's okay. We're going to pretend that Polaris is at exactly 90° north, just for a little bit.

So, standing at the north pole, which is 90° north, we look at Polaris, which is also 90° north. By definition, Polaris must be directly overhead. Another way to say this is that Polaris is at our zenith; "zenith" is an astronomical term which means "up". Yet another way of stating this is to say that if we were to measure the angular distance in the sky from the horizon to Polaris, it would be 90°, as 90° defines the zenith, or up, or "directly overhead", or however you want to say that.


Very Important Concept: Every star, and also every other celestial body, at any given moment in time has some point on the earth which is directly "below" it.
This point is called the Geographic Position, or GP.

If you now walk one mile south from the north pole (every direction is "south" from the north pole) and again measure the angular distance from the horizon to Polaris, you find that Polaris is now 89° 59' from the horizon. And, your latitude is 89° 59' north of the equator. And, you are now one nautical mile away from the GP of Polaris. You could be anywhere on a circle which is exactly one nautical mile around the GP of Polaris, but you are definitely somewhere on that circle. This is called a Circle of Equal Altitude.

That was also a Very Important Concept.

So, let's continue with the exercise. Continue walking (and swimming and whatever it takes) southward until you get to the equator. Now turn around, and look at Polaris again. Now, Polaris is just touching the horizon. The angular distance between Polaris and the horizon, which is also called the altitude of Polaris, is 0°. And your latitude is also 0°. Another way to say this is that the distance from your zenith down to Polaris is 90°, and the distance from the GP of Polaris to where you are standing is also 90° on the globe. And so you are standing somewhere on a circle of equal altitude 90° away from the GP of Polaris.


Now, imagine walking back north to the place where you live (if you don't happen to live in the northern hemisphere, just play along for a minute). I happen to live in Seattle, so I'm going to use Seattle for this part of the exercise, but by all means try this with your own actual latitude. Seattle is at about 48° north. As you walk northward, Polaris will move higher and higher in the sky, until it is at 48° above the horizon. The altitude of Polaris is 48°, and your latitude is 48° north. The other way to say this is that the distance from your zenith to Polaris is 42° (90°-48°=42°) and the distance between yourself and the GP of Polaris is also 42°. And so you are standing somewhere on a circle of equal altitude 42° away from the GP of Polaris.


From here, it is an easy step to see that the altitude of any celestial object defines a circle of equal altitude around the Geographic Position of that object. The distance from the GP is simply 90° minus the altitude.


In this illustration, you are somewhere on the circle of equal altitude around the GP of the object. But where? That circle could be thousands of miles in circumference. The answer is simple; measure the altitude of two more celestial bodies. Where the three circles of equal altitude intersect is your location on the globe.


In a very real sense, that's all there is to it. In principle, with a globe in-hand, you could go out on deck with your sextant, measure the altitude of three stars, plot the GPs of those stars on the globe, subtract the altitudes you shot from 90° to determine the size of the circle, in degrees, to draw around each of the respective GPs. Where the three circles intersect is your position.

This does work, and in fact was one of the ways early European navigators did such things. However, it can only yield a position accurate to within several hundred miles. Which isn't horrible out in the middle of the ocean; it would at least give you some idea of which course to steer to get back to your own country.

But we can do much, much better.

The rest of this course will focus on how to take these concepts and turn them into a position which is functionally as accurate as one derived from GPS.

Wednesday, September 14, 2011

Celestial Navigation 101: Introduction

Strait of Magellan draws a fairly diverse readership from across a pretty broad spectrum of industries and interests. It isn't uncommon to get lively discussions here between career mariners and rocket scientists and astrophysicists, sometimes on the same topic. Which is great, but it occasionally provides a challenge in keeping posts, if not directly relevant to each reader's primary interests, at least comprehensible. It isn't as difficult in cases like space science, where I myself am just an amateur and a hobbyist. If anything, I'm surprised on the rare occasions that I have anything to contribute to the discussion at all. However, in some fields, including celestial navigation, I am more comfortable claiming some modicum of expertise. And some of the readers here are rather more expert than myself in these fields, so I occasionally find myself writing to that niche.


Last night I was working on a fairly lengthy post which fell into that category. It discussed some departures from standard celestial navigation protocols which I thought would at least generate some interesting discussion. However, as I was writing the post, I found myself stopping to explain the rudiments of celnav every other paragraph or so, in order to keep the post somewhat readable to more than two or three celnav geeks who read this blog. This very rapidly derailed the post.

Coincidentally yesterday, I was going back and looking at some earlier celnav posts, and saw a note from Lefwyn asking if I could provide a basic primer on celestial navigation for the non-navigation types.

So, with these two things in mind, I'm beginning a series of very rudimentary discussions of the underlying principles of celestial navigation here. This may lead into similarly rudimentary discussions of actual techniques.

I'm going to be creating some new illustrations in MS Paint to go along with this. They won't be pretty, and the creation of them may slow things down a bit, but I think they'll be helpful in the long run. And as an added bonus, I'll be able to utilize them in my classroom courses.

This series of posts will be tagged "Celestial Navigation 101", so that eventually they will be an easily accessible online resource for anyone interested in such things.

More to come.